DIY Wooden Bird Feeders That Will Stand Out at Craft Fairs and Online Shops

DIY Wooden Bird Feeders That Will Stand Out at Craft Fairs and Online Shops

DIY Wooden Bird Feeders That Will Stand Out at Craft Fairs and Online Shops

Are you a crafty individual with a passion for woodworking and a love for birds? If so, why not combine your talents and create stunning, handcrafted bird feeders that will attract attention at craft fairs and online shops? By adding a touch of creativity and personalized designs, your bird feeders can become unique works of art, capturing the hearts of bird lovers and nature enthusiasts alike.

Crafting Bird Feeders that Sing

The key to success in the competitive world of craft fairs and online shops is to offer something special, something that sets your creations apart. Forget about plain, generic feeders; focus on crafting bird feeders that tell a story, evoke emotions, and showcase your unique artistic vision.

Embrace the Unexpected

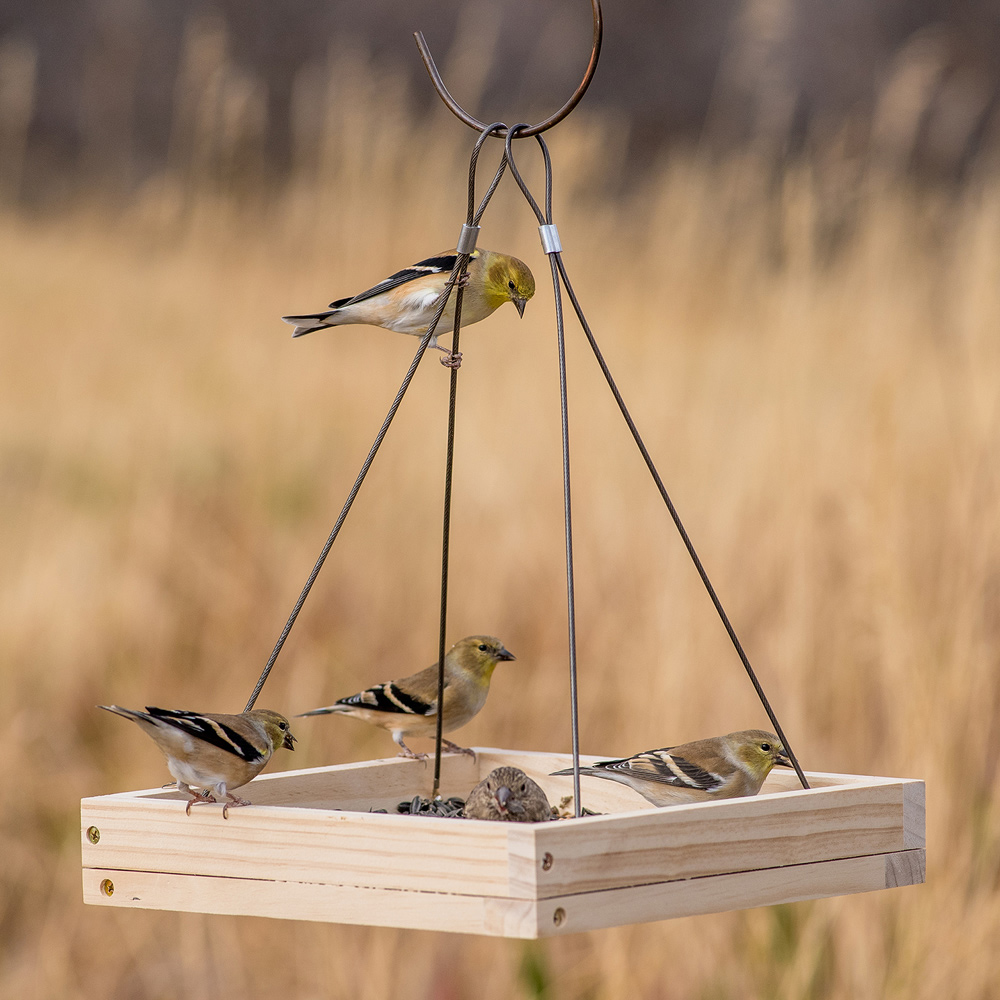
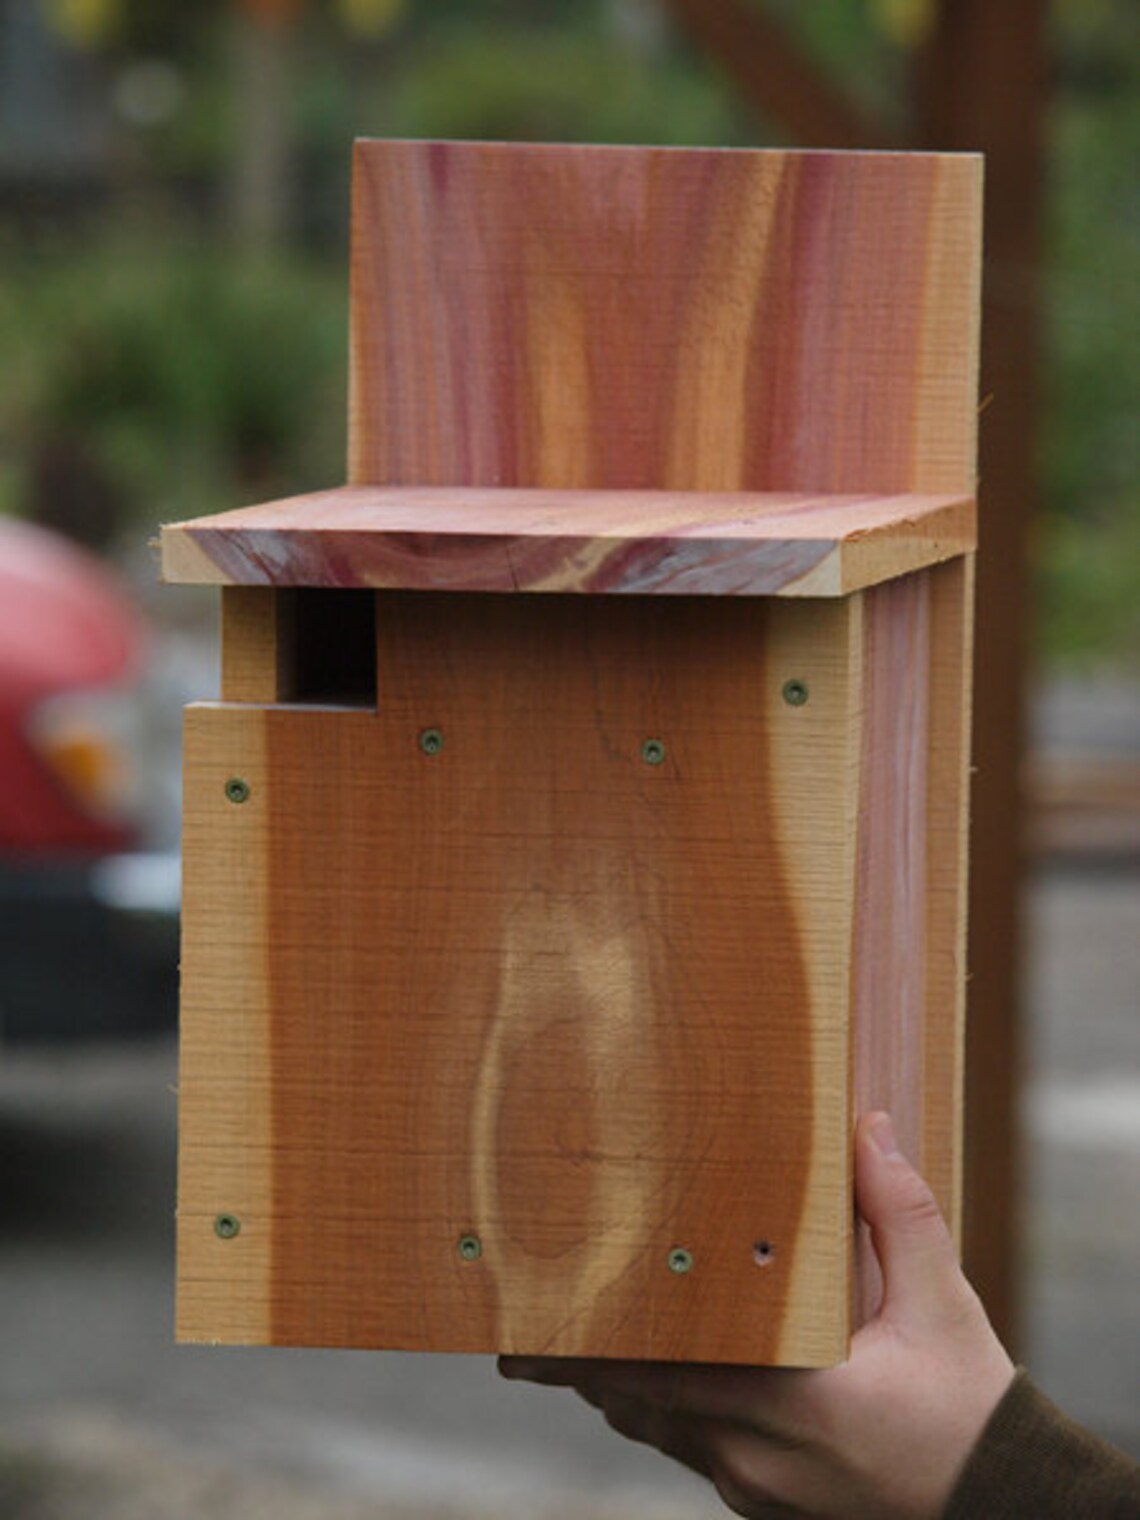
Step away from the traditional rectangular or round feeders and embrace unconventional shapes. Imagine a bird feeder shaped like a whimsical birdhouse, a charming cottage, or a charming gnome's dwelling. The possibilities are endless!

Incorporate Natural Elements

Nature provides an abundance of materials that can enhance the beauty of your bird feeders. Consider using twigs, branches, moss, pine cones, and even natural stones to create rustic and organic designs. These elements add a touch of authenticity and connect your creations to the natural world.

Personalize with Paint and Detail

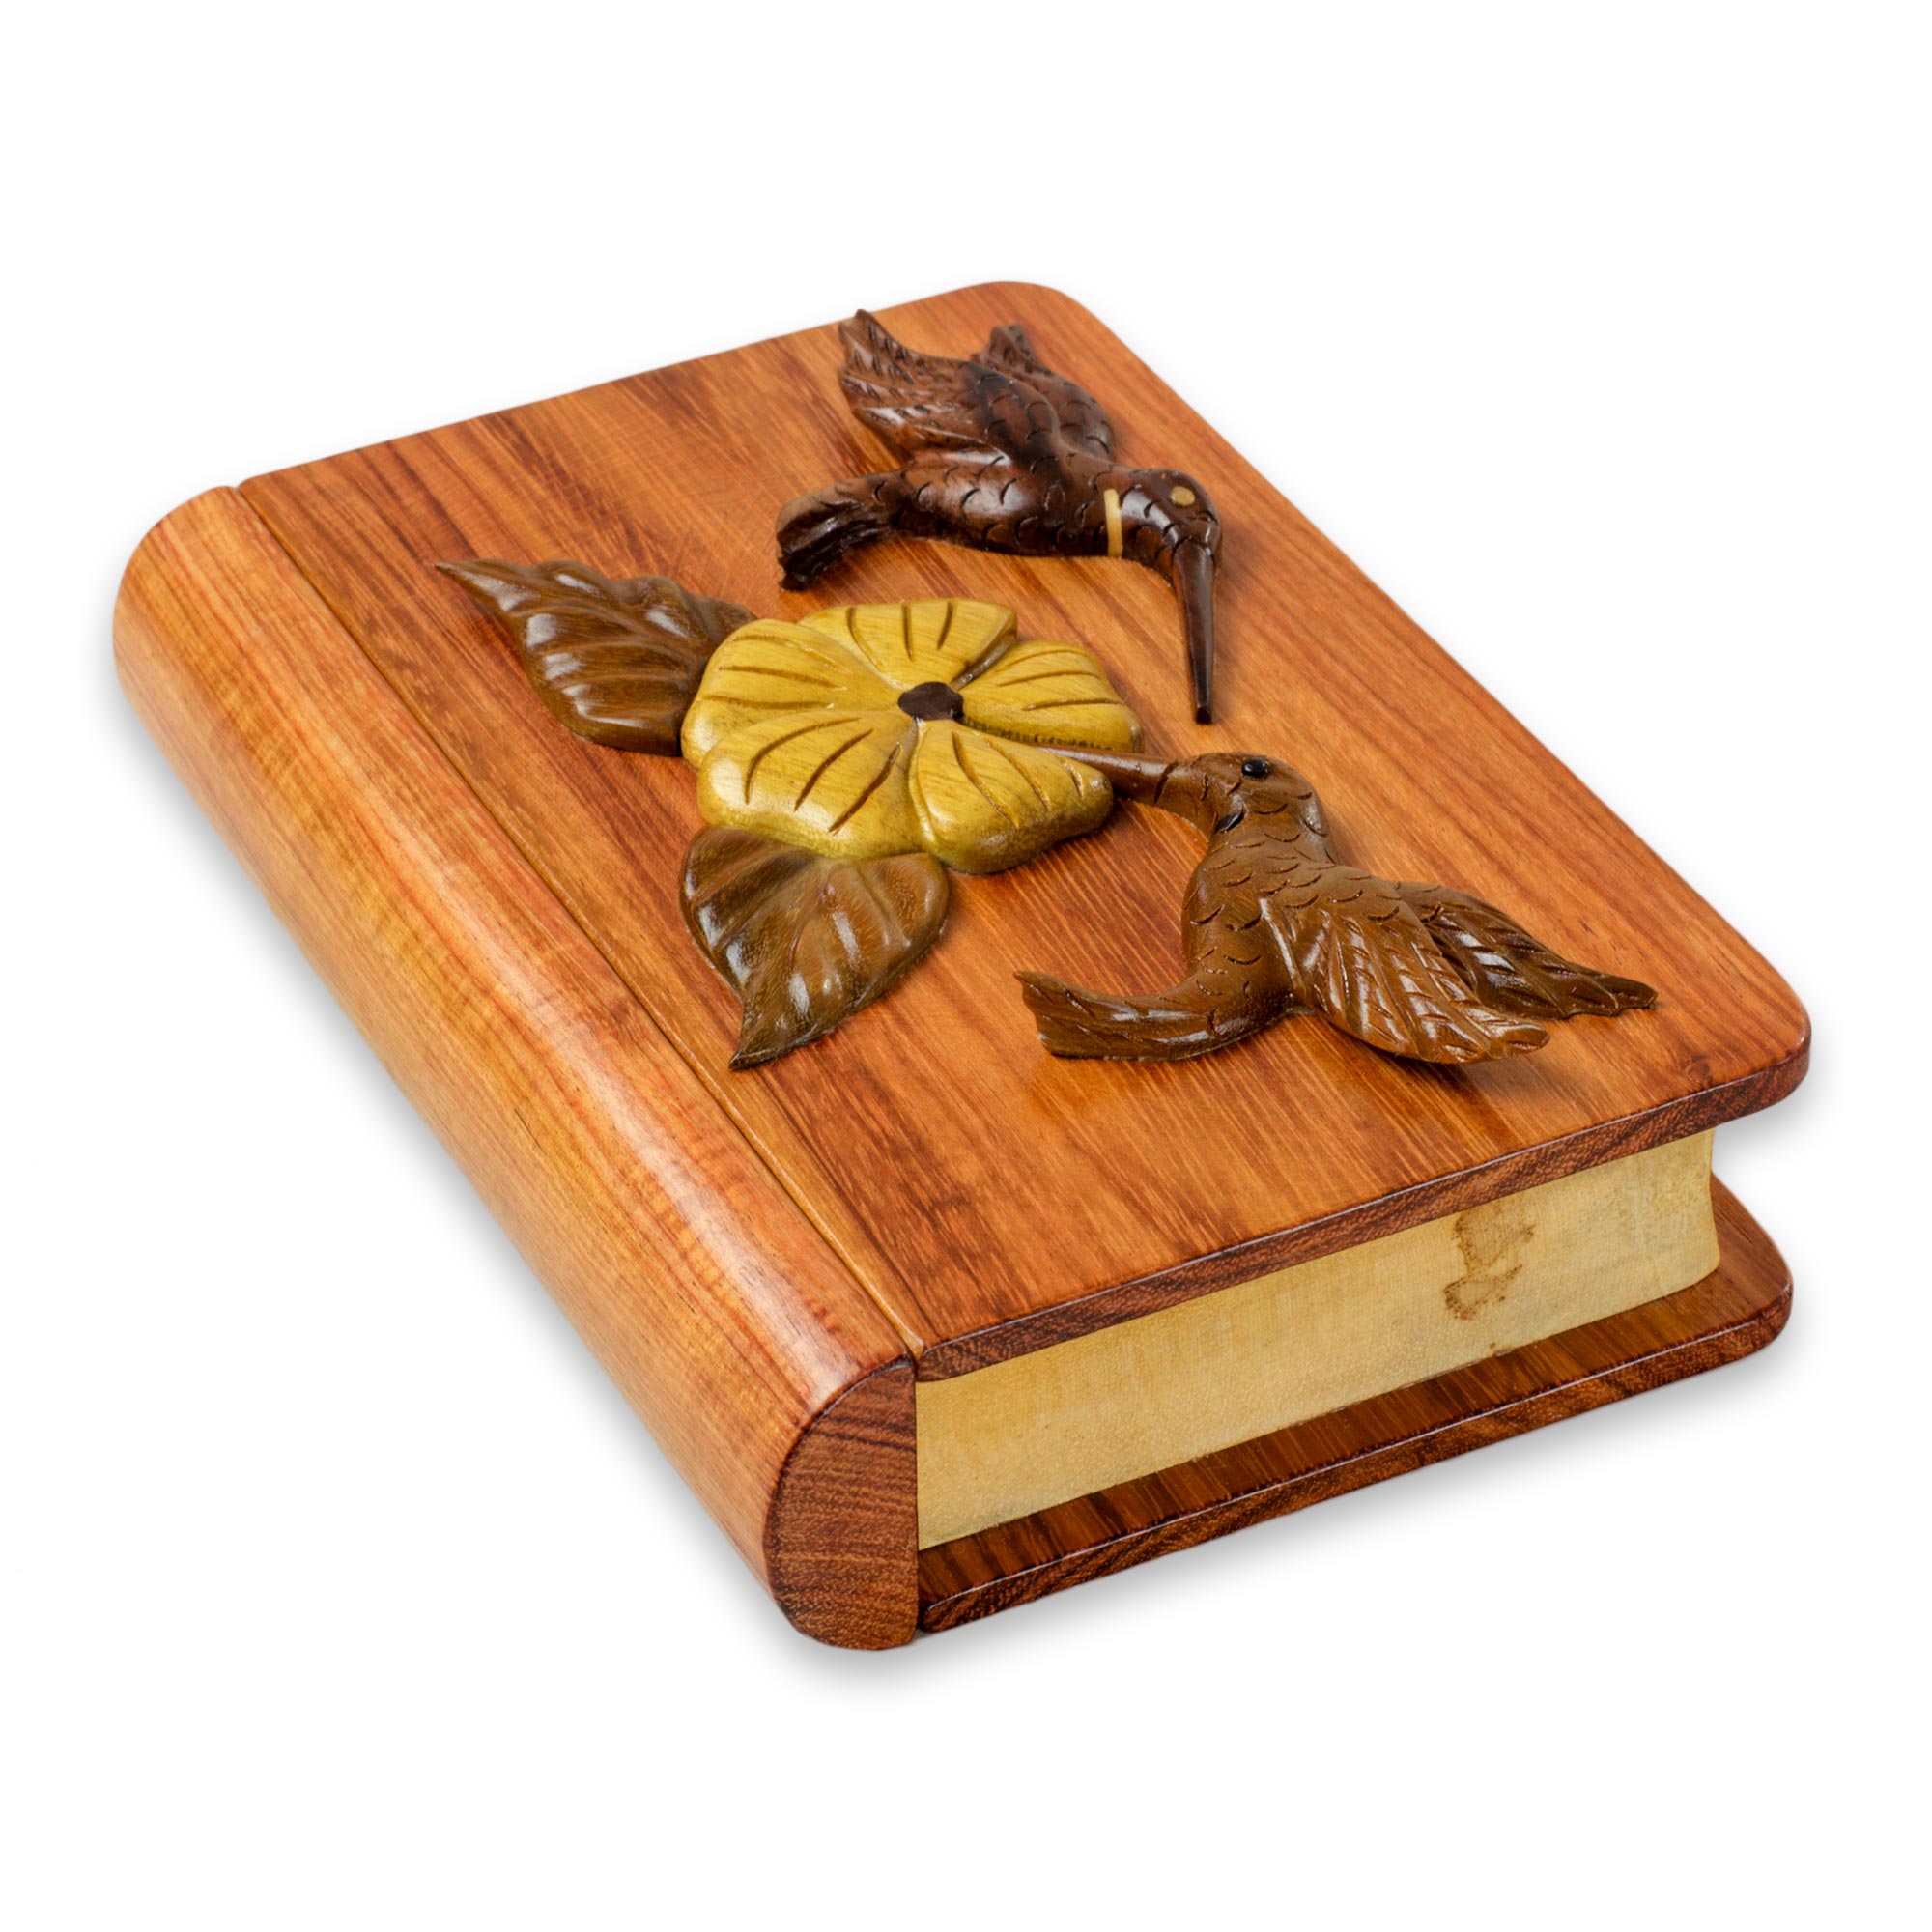
Once you have your basic feeder shape, it's time to add personality. Let your imagination run wild with paint, stencils, and embellishments. Paint vibrant flowers, whimsical birds, or intricate patterns. You can also add charming details like miniature birdhouses, decorative windows, or whimsical doors.

Marketing Your Bird Feeders for Success

Now that you have crafted beautiful, unique bird feeders, it's time to showcase them to the world. Marketing your creations effectively can make all the difference in attracting customers and generating sales.

Craft Fairs and Events

Craft fairs provide a fantastic platform to showcase your handcrafted bird feeders to a captive audience. Choose events that cater to nature enthusiasts, bird lovers, and those who appreciate handcrafted goods. Be sure to bring eye-catching displays, brochures, and business cards to create a memorable experience for potential customers.

Online Marketplaces

Online marketplaces offer a global audience for your creations. Platforms like Etsy, Amazon Handmade, and Shopify allow you to showcase your bird feeders to a vast network of potential buyers. Create high-quality product photos and write compelling descriptions that highlight the unique features and craftsmanship of your feeders.

Social Media Presence

Social media is an invaluable tool for promoting your bird feeders. Create engaging content featuring beautiful photos and videos of your creations, showcase customer testimonials, and offer behind-the-scenes glimpses into your creative process. Build a following of bird lovers and nature enthusiasts, and connect with them on a personal level.

Building a Bird Feeder Business

With creativity, dedication, and a touch of marketing savvy, you can transform your passion for bird feeders into a thriving business. Here are some tips to help you grow and succeed:

Expand Your Product Line

Offer a variety of bird feeders in different sizes, shapes, and styles to cater to diverse tastes and needs. Consider creating feeders specifically designed for different types of birds, or feeders that offer unique features like hanging baskets or seed compartments.

Provide Excellent Customer Service

Building strong relationships with your customers is essential. Respond to inquiries promptly, offer personalized advice, and provide exceptional after-sales support. Treat your customers like valued members of your bird-loving community.

Promote Sustainability

In today's environmentally conscious world, consumers are increasingly drawn to sustainable products. Highlight the use of reclaimed or recycled materials in your bird feeders. Consider offering options for eco-friendly packaging and shipping methods.

By embracing creativity, incorporating unique designs, and marketing your bird feeders effectively, you can create a successful and fulfilling business that celebrates both your passion for woodworking and your love for birds.

Read More..

How to Create Tiered Plant Stands for Indoor Plant Lovers

How to Create Tiered Plant Stands for Indoor Plant Lovers

Elevate Your Indoor Greenery: A Comprehensive Guide to Crafting Tiered Plant Stands

Indoor plant enthusiasts are constantly seeking creative ways to display their verdant collections. Tiered plant stands offer a stylish and efficient solution, maximizing space while showcasing the beauty of your botanical treasures. This guide will provide a comprehensive overview of creating tiered plant stands, from choosing materials to assembling and decorating.

Choosing the Right Materials

The first step in crafting a tiered plant stand is selecting materials that align with your desired aesthetic and practicality. Consider the following:

Wood

Wood is a classic and versatile choice for tiered plant stands. It offers a natural warmth and can be stained or painted to complement any decor. Popular wood types include:

  • Pine: Affordable and easy to work with.
  • Oak: Durable and provides a rich, rustic appearance.
  • Mahogany: Elegant and boasts a deep, reddish hue.
  • Reclaimed wood: Adds character and sustainability to your project.

Metal

Metal plant stands exude a modern and industrial vibe. They are sturdy and can be found in various finishes, such as:

  • Black metal: Creates a sleek and contemporary look.
  • Copper: Adds warmth and a touch of elegance.
  • Brass: Offers a vintage and luxurious feel.

Other Materials

Beyond wood and metal, explore creative options like:

  • PVC pipe: Affordable and easily cut and assembled.
  • Upcycled materials: Repurpose old ladders, crates, or furniture for a unique and sustainable stand.

Designing Your Tiered Plant Stand

Once you've chosen your materials, consider the following design elements:

Number of Tiers

Determine how many tiers you need to accommodate your plants. Consider the height of your plants and the overall space you have available.

Shape

Tiered plant stands come in various shapes, including:

  • Circular: Adds a touch of whimsy and softens the space.
  • Square: Offers a clean and contemporary look.
  • Rectangular: Practical and provides ample display space.

Style

Select a style that complements your decor. Popular options include:

  • Rustic: Incorporate reclaimed wood and natural elements.
  • Minimalist: Opt for clean lines and a simple design.
  • Industrial: Feature metal accents and exposed piping.

Construction Techniques

The construction process will vary depending on the chosen materials and design. However, some common techniques include:

Wood

  • Joining methods: Use dowels, screws, or mortise and tenon joints for sturdy connections.
  • Finishing: Sand the wood to a smooth finish, then apply stain, paint, or varnish.

Metal

  • Welding: Use a welder to create strong and lasting connections.
  • Bolting: Secure metal components with bolts and nuts.
  • Finishing: Consider powder coating for a durable and scratch-resistant finish.

PVC Pipe

  • Cutting: Use a saw to cut PVC pipe to your desired length.
  • Joining: Use PVC glue or couplings to connect pieces.
  • Finishing: Paint or wrap the PVC pipe to personalize its appearance.

Assembly and Decoration

Once the construction is complete, assemble the tiered plant stand according to your design. You can enhance its appearance through various decoration techniques:

Paint

Apply paint to create a cohesive look or highlight specific features of the stand. Consider using stencils for intricate patterns or adding a distressed finish.

Stain

Enhance the natural beauty of wood by applying a stain. Choose from various colors and finishes to achieve your desired aesthetic.

Hardware

Add decorative hardware, such as knobs, pulls, or hinges, to enhance the stand's visual appeal and functionality.

Plants

Finally, arrange your plants on the tiers, ensuring they have adequate space and access to sunlight. Experiment with different plant combinations to create a visually pleasing and balanced display.

Safety Considerations

To ensure the safety of your plant stand and its occupants, keep the following in mind:

  • Stability: Choose materials and construction methods that create a stable and sturdy stand.
  • Weight distribution: Distribute the weight of your plants evenly across the tiers to prevent tipping.
  • Placement: Position the stand in a location that is safe from foot traffic and potential falls.

Conclusion

Creating a tiered plant stand is an enjoyable and rewarding project that allows you to display your indoor plant collection with style and efficiency. By carefully choosing materials, designing your stand, and paying attention to safety, you can craft a functional and visually appealing addition to your home. Remember to personalize your stand with paint, stain, hardware, and carefully selected plants, creating a unique centerpiece that reflects your personal style.

Read More..

Holiday Woodworking Projects for Outdoor Christmas Decor

Holiday Woodworking Projects for Outdoor Christmas Decor

Holiday Woodworking Projects for Outdoor Christmas Decor

As the holiday season approaches, many homeowners seek to adorn their outdoor spaces with festive cheer. Woodworking offers a unique and personal way to create beautiful and lasting Christmas decorations. This article explores a range of holiday woodworking projects for outdoor Christmas decor, catering to diverse skill levels and aesthetic preferences.

Classic Christmas Characters

Classic Christmas characters like Santa Claus, reindeer, and snowmen provide timeless charm and instantly recognizable symbols of the holiday season.

Santa Claus

A wooden Santa Claus figurine can be a focal point for your outdoor decor. Begin by sketching the design on plywood or pine board. Carve out the basic shape of Santa's body, head, and beard using hand tools or a jigsaw. Add details like a hat, belt, and boots using a chisel or carving tools. Paint the figurine in traditional red and white colors, leaving the beard white or a natural wood color. You can further enhance the piece by attaching a simple wooden base for stability.

Reindeer

Reindeer figures can be crafted from wood scraps or plywood. Use a jigsaw or band saw to cut out the basic reindeer shape, including the antlers. Add details like eyes, nose, and hooves by carving or using wooden dowels. Paint the reindeer in brown, white, or a combination of colors to create a realistic or stylized look. Attach the figures to a wooden base or fence post for display.

Snowmen

Snowmen provide a whimsical and playful element to outdoor decor. Cut three circular shapes from wood, progressively smaller in size, to represent the snowman's body. Stack the circles together using wood glue or screws. Add details like eyes, a carrot nose, and a scarf using wood scraps, buttons, or felt. Paint the snowman white and create a black top hat from a piece of cardboard or wood.

Festive Wreaths

Wreaths are a versatile holiday decoration that can be incorporated into various outdoor settings. Wooden wreaths offer a rustic and natural aesthetic.

Wooden Wreath Base

You can create a wreath base using a circular piece of plywood, a repurposed wooden wheel, or even a grapevine wreath form. Attach small branches or twigs to the base using nails or wire to create a base for embellishments. Add festive touches like pinecones, berries, and dried fruit to the wreath.

Wreath Ornaments

Create unique ornaments for your wooden wreath by crafting wooden stars, snowflakes, or other holiday shapes. Use a jigsaw or scroll saw to cut out the ornaments, and embellish them with paint, glitter, or felt.

Illuminated Holiday Scenes

Illuminated holiday scenes add a magical touch to your outdoor space.

Wooden Houses

Construct miniature wooden houses, such as gingerbread houses, and incorporate battery-powered LED lights for a warm glow. Create realistic details like doors, windows, and chimneys using woodworking tools and craft materials.

Lighted Christmas Trees

Craft a stylized Christmas tree from wood, either using a simple silhouette or a more detailed design with branches. Incorporate battery-powered LED lights, either strung around the outline or embedded within the branches for a festive touch. You can also add wooden ornaments to the tree for a personalized feel.

Rustic Holiday Accents

Rustic holiday accents add a warm and inviting atmosphere to your outdoor decor.

Wooden Signs

Create wooden signs with festive messages or greetings. Use a jigsaw to cut out the sign shape and a woodburning tool to create lettering or decorative elements. Paint the sign with a rustic finish or leave it in its natural wood color.

Wooden Candlesticks

Construct rustic wooden candlesticks to hold holiday-themed candles. You can use simple wooden blocks or create more elaborate designs with carved details. Ensure that the candlestick is stable and can accommodate the size of the candle you plan to use.

Wooden Lanterns

Design and build wooden lanterns to provide warm ambient light. You can incorporate a variety of shapes and styles, from simple geometric forms to intricate designs with latticed patterns. Use clear glass or acrylic panels for the lantern's sides to allow light to shine through.

Tips for Creating Holiday Woodworking Projects

Whether you are a seasoned woodworker or a beginner, these tips can help you create successful and enjoyable holiday woodworking projects.

Design and Planning

  • Sketch out your ideas: Before you start cutting, sketch out your design on paper. This allows you to visualize the final product and make any necessary adjustments.
  • Choose the right wood: Select wood types suitable for the specific project. Consider factors like grain patterns, durability, and availability.
  • Plan for safety: Always prioritize safety when working with wood. Use appropriate safety gear and work in a well-ventilated area.

Construction

  • Use sharp tools: Sharp tools are essential for clean cuts and accurate results.
  • Secure your work: Use clamps or a workbench to keep your workpieces stable during cutting and assembly.
  • Be precise with measurements: Accuracy is crucial for achieving a finished product that fits together properly.
  • Use wood glue and screws: For durable and long-lasting projects, use wood glue and screws for assembly.

Finishing Touches

  • Sanding: Smooth out any rough edges or imperfections with sandpaper for a polished finish.
  • Painting and Staining: Add color and depth to your projects with paint or stain.
  • Decorative Details: Incorporate details like ribbon, beads, or buttons to enhance the festive appeal of your creations.
  • Weatherproofing: If you plan to display your projects outdoors, consider using a sealant or weatherproofing finish to protect them from the elements.

Whether you choose to craft classic Christmas characters, festive wreaths, or rustic holiday accents, woodworking offers a unique and personal approach to creating charming outdoor Christmas decor. By carefully planning, executing, and finishing your projects, you can create beautiful and lasting additions to your holiday celebrations.

Read More..

How to Build Shoe Racks with Storage Options for Extra Profit

How to Build Shoe Racks with Storage Options for Extra Profit

Turning Your Passion for DIY into Profit: Building Shoe Racks with Storage Options

Do you have a knack for building practical and stylish furniture? Are you looking for a way to turn your woodworking skills into a profitable venture? Look no further than building shoe racks with storage options! This is a fantastic opportunity to tap into a market that’s constantly in demand, especially for homeowners seeking solutions for their cluttered entryways and bedrooms. This article will guide you through the process, from planning to marketing, so you can build your dream business â€" one shoe rack at a time.

Identify Your Target Audience

Before you start hammering and sawing, understand who your ideal customer is. Are you targeting families with young children, busy professionals, or minimalist homeowners? Knowing your audience will help you tailor your designs, pricing, and marketing efforts.

Consider These Customer Groups:

  • Families with young children: Opt for sturdy, easy-to-clean designs with compartments for different shoe types. Think about adding hooks for backpacks and other essentials.
  • Busy professionals: Focus on sleek, modern designs that offer a place for both shoes and accessories like purses, briefcases, or umbrellas.
  • Minimalist homeowners: Design functional and visually appealing shoe racks that blend seamlessly with their decor. Offer options with hidden storage or sleek minimalist designs.

Design Shoe Racks That Stand Out

In today’s market, your shoe rack design needs to be more than just functional. It needs to be eye-catching and offer unique storage solutions. Experiment with different materials, finishes, and add-ons to create a range of shoe rack options:

Design Elements to Consider:

  • Materials: Use wood, metal, or a combination of both. Explore different wood species, finishes, and metal types to create various looks and price points.
  • Storage Options: Go beyond basic shelves. Include drawers for smaller items, cubbies for boots, or pull-out shelves for easy access.
  • Customization: Offer options for personalization, such as different stain colors, hardware choices, or even custom sizes to fit specific spaces.
  • Style: Embrace various styles, from modern and minimalist to rustic and farmhouse. Offer shoe racks that complement a variety of home decor aesthetics.

Focus on High-Quality Craftsmanship

Your success depends on producing durable and well-made shoe racks. Invest in quality materials, utilize appropriate joinery techniques, and pay close attention to detail. This commitment to craftsmanship will build trust with customers and ensure your products stand the test of time.

Pricing Your Shoe Racks Strategically

Determine a pricing strategy that covers your costs, allows for profit, and remains competitive. Consider the cost of materials, labor, and any additional services you offer, such as delivery or installation. Research competitor pricing to ensure your prices are in line with the market.

Marketing Your Shoe Racks for Success

Get the word out about your fantastic shoe racks! Utilize a multi-pronged marketing approach to reach your target audience:

Marketing Tactics:

  • Online Marketplaces: List your shoe racks on platforms like Etsy, Amazon Handmade, or Facebook Marketplace. These platforms offer a wide reach and convenient purchasing options for customers.
  • Social Media: Build a presence on Instagram, Pinterest, or Facebook. Showcase your shoe racks in captivating photos and videos, highlighting their functionality and style. Run targeted ads to reach your ideal customer base.
  • Local Events: Participate in craft fairs, home improvement shows, or community events to connect with potential customers face-to-face. Bring samples of your shoe racks and offer discounts for onsite purchases.
  • Website: Create a website that showcases your shoe racks, pricing, and ordering information. This provides a platform for customers to learn about your brand and shop conveniently online.

Building shoe racks with storage options is a fulfilling and profitable venture. By combining your passion for woodworking with sound business strategies, you can create a thriving enterprise that brings organization and style to homes across your community. Remember to continuously improve your designs, offer exceptional customer service, and stay adaptable to market trends to ensure long-term success.

Read More..

Unique Birdhouse Woodworking Projects to Sell Online

Unique Birdhouse Woodworking Projects to Sell Online

Unique Birdhouse Woodworking Projects to Sell Online

Hey there, woodworking enthusiasts! Are you looking for some creative and profitable woodworking projects to sell online? Well, look no further! Birdhouses are a classic and timeless choice that can be tailored to appeal to a wide range of customers. In this article, we'll explore some unique birdhouse designs that are sure to stand out in the market, along with tips for making and selling your creations.

Why Birdhouses are a Great Choice

Birdhouses offer a fantastic blend of practicality and aesthetic appeal. They're not just homes for feathered friends; they add a touch of charm and personality to gardens, backyards, and even balconies. Here are a few reasons why birdhouses are a great project to pursue:

  • Universal Appeal: Birdhouses appeal to a broad customer base, from nature enthusiasts to homeowners seeking to attract birds to their gardens.
  • Seasonal Demand: The demand for birdhouses peaks in the spring and summer months, offering a potential for consistent sales.
  • Customization Options: Birdhouses provide endless possibilities for creativity. You can experiment with different shapes, sizes, materials, and decorative elements to create unique pieces.
  • Profitability: With a little effort and creativity, you can craft high-quality birdhouses that can be sold for a good profit margin.

Unique Birdhouse Designs to Spark Your Creativity

Forget the traditional plain box! Let's dive into some innovative birdhouse ideas that will make your creations stand out from the crowd:

1. Miniature Cottage Birdhouses

Capture the charm of a quaint cottage by building miniature birdhouses that resemble tiny homes. Think gabled roofs, small windows, and maybe even a little porch. Paint them in warm, earthy tones, and consider adding a touch of whimsy with miniature garden details like tiny flower pots or a tiny picket fence.

2. Rustic Log Cabin Birdhouses

Embrace the rustic charm of a log cabin by crafting birdhouses using rough-hewn wood logs or planks. You can achieve a genuine log cabin look by stacking the logs, leaving natural bark edges visible, and using rustic wood accents. Consider incorporating a moss-covered roof for an extra touch of nature.

3. Whimsical Fairy Tale Birdhouses

Let your imagination run wild by building birdhouses that resemble magical castles, whimsical trees, or even enchanted mushrooms! You can use a combination of different wood types, colorful paints, and intricate details to create a truly unique fairy tale world. These birdhouses would be perfect for children's gardens or magical-themed spaces.

4. Upcycled Birdhouses

Get creative with repurposed materials by turning old items into unique birdhouses. Think about using old teacups, coffee cans, vintage suitcases, or even old watering cans. Not only will you create one-of-a-kind birdhouses, but you'll also be contributing to a more sustainable approach to crafting.

5. Birdhouse with Built-In Feeders

Combine functionality with charm by crafting birdhouses with integrated feeders. You can create a small platform or a hanging feeder directly below the nesting cavity, offering birds a convenient source of food. This will make your birdhouses even more appealing to birdwatchers and those looking to attract birds to their gardens.

6. Birdhouse with a Secret Compartment

Add a touch of mystery and intrigue by incorporating a hidden compartment into your birdhouse. This can serve as a fun secret storage space for small items, or you could even create a small "treasure chest" for a little bird to stash away their finds. Make sure the compartment is secure enough to keep its contents safe.

Tips for Making and Selling Your Birdhouses

You've got the creative ideas, now let's talk about turning those ideas into successful products you can sell online. Here are some essential tips:

1. Choose the Right Materials

Quality materials will make all the difference in the longevity and appeal of your birdhouses. Consider using:

  • Cedar: Known for its durability, weather resistance, and natural insect-repelling properties.
  • Redwood: Another durable and rot-resistant wood, often used for outdoor structures.
  • Pine: A budget-friendly option that is easily worked with but may require more care to resist weather damage.
  • 2. Focus on Functionality

    Remember, birdhouses are meant to be homes for birds. Ensure the entrance hole is the appropriate size for the type of bird you're targeting. Make sure the interior provides sufficient space for nesting and raising young, and add ventilation holes to prevent moisture buildup. Think about how your design will accommodate cleaning and how easy it will be for you to assemble and disassemble.

    3. Consider Your Target Market

    Tailor your designs to specific audiences. For example, if you're targeting birdwatchers, you could create birdhouses with clear viewing windows. For families with young children, you might design birdhouses with whimsical elements or characters they'd enjoy.

    4. Showcase Your Work

    Take high-quality photos of your birdhouses in natural settings. Highlight their unique details and features. Consider using props like flowers, plants, or miniature garden accessories to enhance the visuals. Showcase the birdhouses in action, perhaps with a real bird perched on the roof.

    5. Choose the Right Online Marketplaces

    Research various online marketplaces and choose platforms where your target audience is most likely to be found. Consider platforms like Etsy, Amazon Handmade, or even your own dedicated website. Each platform has its own fees, terms, and audience.

    6. Set Competitive Prices

    Research the market to determine competitive pricing for birdhouses similar to yours. Consider your materials cost, time spent, and the value you are offering. Don't be afraid to price your work fairly; quality craftsmanship deserves to be appreciated.

    7. Provide Excellent Customer Service

    Respond to inquiries promptly, address any concerns professionally, and strive to make your customers feel valued. Happy customers are likely to return for more and to spread the word about your unique birdhouse creations.

    Conclusion

    By blending creativity with practicality, you can craft truly unique and functional birdhouses that will capture the attention of customers online. Remember, woodworking is a rewarding hobby and a potentially profitable business venture. So, get your tools ready, embrace your artistic side, and start creating those stunning birdhouse designs!

    Read More..

    Romantic Woodworking Gift Ideas: Express Your Love Through Craft

    Romantic Woodworking Gift Ideas: Express Your Love Through Craft

    Romantic Woodworking Gift Ideas: Express Your Love Through Craft

    Looking for a unique and heartfelt way to express your love? Step away from the generic chocolates and flowers and embrace the artistry of woodworking. Crafting a personalized wooden gift is a beautiful and thoughtful gesture that speaks volumes about your affection and dedication.

    Woodworking gifts offer a touch of warmth, elegance, and longevity that other gifts simply can't match. They're a testament to your creativity and a lasting symbol of your love. Plus, the process of creating a piece from scratch is a deeply personal and fulfilling experience, adding an extra layer of meaning to your gift.

    Whether you're a seasoned woodworker or just starting out, there are plenty of romantic woodworking projects that are within your reach. This article will guide you through some inspiring ideas, from simple and charming to intricate and elaborate.

    Classic Romantic Woodworking Gifts

    Start with the basics and create classic romantic woodworking gifts that are sure to impress your loved one:

    Engraved Wooden Box

    A timeless classic, a wooden box engraved with a special message or a cherished photo is a sentimental and practical gift. Choose from a variety of wood types like walnut, cherry, or mahogany to complement the occasion.

    Personalized Wooden Jewelry Box

    For the fashion enthusiast, a handcrafted wooden jewelry box is a beautiful and practical gift. Incorporate decorative elements like dovetails, inlays, or a unique finish to add a personal touch.

    Wooden Picture Frame

    Showcase a cherished photograph in a custom-made wooden frame. Experiment with different wood types and stain colors to create a unique and personalized piece. You can even add a small inscription on the back for an extra special touch.

    Unique and Creative Woodworking Gifts

    Beyond the classics, consider these unique and creative woodworking gifts that go the extra mile:

    Wooden Wine Rack

    For the wine lover in your life, a handcrafted wooden wine rack is a practical and stylish gift. Choose from a variety of designs, from simple and functional to elaborate and artistic.

    Wooden Cutting Board

    A personalized wooden cutting board is a gift that will be used and enjoyed for years to come. You can engrave it with their initials, a meaningful quote, or a special date.

    Wooden Serving Tray

    Create a beautiful wooden serving tray perfect for entertaining. Add decorative elements like handles, inlays, or a unique finish to personalize it further.

    Personalized Wooden Gifts

    To truly make your gift special, consider these personalized woodworking ideas:

    Wooden Heart Keychain

    A small but meaningful gift, a wooden heart keychain can be engraved with a special message or their initials.

    Wooden Coasters

    Protect their furniture with a set of personalized wooden coasters. You can engrave them with their names, a special date, or a meaningful quote.

    Custom Wooden Signs

    Create a custom wooden sign for their home, featuring their names, a favorite quote, or a special message. You can also create a unique design to match their style.

    Tips for Woodworking Gifts

    Here are some tips to make your woodworking gift truly special:

    • Choose high-quality wood and tools.
    • Pay attention to detail and craftsmanship.
    • Add a personal touch with engraving, inlays, or a unique finish.
    • Present your gift in a beautiful and thoughtful way.

    Remember, the most important thing is to put your heart into your project. A homemade woodworking gift is a truly unique and cherished expression of your love.

    Read More..

    Give the Gift of Handmade Wood Creations

    Give the Gift of Handmade Wood Creations

    The Gift of Handmade Wood Creations

    In a world increasingly dominated by mass-produced goods, the appeal of handcrafted items has never been stronger. Handmade wood creations, in particular, possess a unique charm and value that resonates deeply with those seeking a truly special and personalized gift. From intricate carvings to functional furniture, these creations offer a tangible expression of artistry, skill, and love.

    The Enduring Allure of Wood

    Wood, as a natural material, holds a timeless appeal. Its rich grain patterns, warm tones, and inherent beauty are captivating. It evokes a sense of connection to nature and a bygone era of craftsmanship. Each piece of wood is unique, with its own story to tell, and this individuality adds to the inherent charm of handmade wood creations.

    A Gift That Speaks Volumes

    Unlike mass-produced items, handcrafted wood creations are imbued with the personality and passion of the artist. The meticulous attention to detail, the skillful manipulation of the wood, and the care that goes into each piece are palpable. This dedication translates into a gift that speaks volumes about the giver's thoughtfulness and appreciation for quality and craftsmanship.

    The Variety of Handmade Wood Creations

    The world of handmade wood creations is incredibly diverse, offering something for everyone. Here are just a few examples:

    Functional & Decorative Pieces

    • Wooden bowls and platters: These are both beautiful and practical, perfect for serving meals or showcasing fruit.
    • Cutting boards: Handmade cutting boards are a treasured kitchen essential, adding a touch of rustic charm to any counter.
    • Jewelry boxes: These offer a secure and stylish place to store precious pieces, and can be personalized with intricate carvings or engravings.
    • Clocks: Handmade wooden clocks add a unique and timeless touch to any room.

    Personalized Gifts

    • Engraved wooden signs: These are perfect for commemorating special occasions or adding a personalized touch to any space.
    • Custom picture frames: A handmade wooden frame elevates a cherished photograph, making it a truly treasured possession.
    • Wooden toys: These offer a safe and stimulating way for children to play and learn, encouraging creativity and imagination.

    Furniture & Home Decor

    • Tables and chairs: Handmade wooden furniture adds a touch of elegance and durability to any home.
    • Sculptures and figurines: These are beautiful statement pieces that can transform a space, adding a touch of artistic flair.
    • Mirrors: Handcrafted wooden frames elevate a simple mirror into a work of art.

    Why Choose Handmade Wood Creations?

    Beyond their aesthetic appeal, handmade wood creations offer a multitude of benefits:

    Uniqueness and Personalization

    Each handmade creation is one-of-a-kind, reflecting the artist's individual style and skill. This uniqueness makes it a truly special and memorable gift.

    Sustainability and Eco-friendliness

    Wood is a renewable resource, and choosing handmade wood creations supports sustainable practices and responsible forestry.

    Durability and Longevity

    Handmade wood creations are crafted with care and skill, using high-quality materials. They are built to last, becoming heirlooms that can be cherished for generations to come.

    Supporting Artisans and Craftsmanship

    By choosing handmade wood creations, you are supporting the work of skilled artisans and contributing to the preservation of traditional craftsmanship.

    Finding the Perfect Handmade Gift

    With the abundance of options available, finding the perfect handmade wood creation as a gift is easier than ever. There are numerous online platforms and local craft fairs that showcase the works of talented woodworkers.

    When choosing a handmade wood creation, consider the recipient's personality, interests, and lifestyle. Think about the occasion for the gift and the message you want to convey.

    Personalized Touches

    Many artists offer personalization options, such as engravings, custom designs, or even the inclusion of a special message. These touches make the gift even more meaningful and unique.

    More Than Just a Gift

    Handmade wood creations are not simply objects. They are tangible expressions of creativity, skill, and love. They are cherished keepsakes that evoke memories and connect people to the beauty of nature and the enduring value of craftsmanship. When you give the gift of a handmade wood creation, you are giving something truly special that will be treasured for years to come.

    Read More..

    Free PDF for DIY Coffee Table Plans and Building Tips

    Free PDF for DIY Coffee Table Plans and Building Tips

    Build Your Own Coffee Table: A Beginner's Guide to DIY Success

    Hey there, DIY enthusiasts! Are you tired of the same old, boring coffee tables you see in every furniture store? Do you dream of a unique and personalized piece that reflects your style and personality? Well, good news â€" you don't need to be a master carpenter to achieve your dream coffee table. With a little time, effort, and this handy guide, you can build your own masterpiece that'll be the envy of your friends and family.

    This guide will walk you through the entire process, from choosing the perfect design to finishing touches. We'll cover everything from selecting the right materials to mastering essential woodworking techniques. Don't worry, we'll keep things simple and straightforward, making it easy for even the most novice DIYers to follow along.

    Step 1: Planning Your Coffee Table Project

    Before you dive into the exciting world of woodworking, it's crucial to have a solid plan. This step involves visualizing your dream coffee table and gathering all the necessary information for a smooth build.

    1.1. Define Your Style and Function

    First things first, let's figure out what kind of coffee table you're envisioning. Do you want something sleek and modern, rustic and farmhouse-chic, or maybe a touch of vintage charm? Consider the overall style of your living room and choose a design that complements it.

    Think about how you'll use your coffee table. Will it be primarily for displaying decorative items, serving drinks and snacks, or a combination of both? This will help you determine the size and functionality you need.

    1.2. Find Inspiration and Designs

    With a basic style in mind, it's time to gather some inspiration! Browse online resources like Pinterest, Houzz, and even Instagram for coffee table ideas. You can find countless examples of different designs, materials, and finishes. This will help you narrow down your choices and refine your vision.

    1.3. Choose Your Materials

    Now, let's talk about the building blocks of your coffee table â€" the materials. The most common choices include:

    • Wood: Wood is a classic and versatile choice for coffee tables. It comes in various types, each with unique properties. Consider pine for affordability, oak for durability, walnut for rich color, and plywood for budget-friendly options.
    • Metal: Metal like iron or steel adds a contemporary touch to your coffee table. It's strong and durable, but can be more challenging to work with than wood.
    • Glass: Glass can be incorporated as the top or side panels of your coffee table, creating a modern and minimalist look. However, be aware that glass can be fragile and prone to scratches.

    Think about the overall aesthetic, durability, and your comfort level working with different materials.

    1.4. Measure and Sketch Your Design

    Once you've settled on your style, materials, and function, it's time to get your design on paper! Measure your space carefully to ensure the coffee table will fit comfortably. Sketch out your design, including the dimensions of the top, legs, and any additional features like shelves or drawers.

    1.5. Create a Materials List

    Now that you have a concrete plan, you need to list out all the materials you'll need for the project. This includes:

    • Wood: Specify the types of wood, dimensions, and quantity you need.
    • Hardware: Include screws, nails, wood glue, finishing nails, and any other fasteners.
    • Finishing Supplies: List any stains, paints, varnishes, or sanding materials you'll use.
    • Tools: Make sure you have all the necessary tools for cutting, measuring, assembling, and finishing your coffee table.

    Step 2: Gather Your Tools and Materials

    With your plan in place, it's time to stock up on the essential tools and materials you need for this exciting project. Here's a list to get you started:

    2.1. Essential Tools

    • Saw: You'll need a saw to cut the wood to size. Consider a circular saw for straight cuts and a jigsaw for curved cuts.
    • Measuring Tape: Crucial for accuracy! Ensure you have a reliable measuring tape.
    • Level: This tool helps ensure that your coffee table is level and stable.
    • Drill: A drill with various drill bits is essential for creating pilot holes and attaching hardware.
    • Screwdriver: You'll need a screwdriver to drive screws into the wood.
    • Clamps: Clamps help hold pieces together while you glue or screw them.
    • Sandpaper: You'll need sandpaper to smooth out any rough edges and prepare the wood for finishing.
    • Safety Gear: Don't forget safety glasses, earplugs, and a dust mask for protecting yourself from sawdust and debris.

    2.2. Materials

    Make sure you have all the materials you listed in your materials list. You may need to visit your local hardware store or lumberyard to purchase any missing items.

    Step 3: Cutting and Shaping Your Wood

    Now comes the fun part â€" cutting and shaping your wood! This is where you bring your design to life. Make sure you have a safe and well-ventilated workspace to work with wood.

    3.1. Measure and Cut Your Pieces

    Using your measuring tape, carefully measure each piece of wood according to your design and make precise cuts using your saw. Remember to always measure twice and cut once to avoid costly mistakes.

    3.2. Sanding and Finishing

    Once your wood is cut, it's time to sand it smooth. This is important for creating a professional finish and preventing splinters. Use different grits of sandpaper, starting with a coarser grit and gradually moving to finer grits.

    3.3. Adding Decorative Elements

    This is where you can add your own personal touch! If your design calls for any decorative elements, such as routered edges, you can do it at this stage.

    Step 4: Assembling Your Coffee Table

    You're almost there! Now it's time to assemble your coffee table. Make sure your workspace is clean and free of clutter.

    4.1. Attaching the Legs

    Start by attaching the legs to the top of your coffee table. This is crucial for stability and durability. Ensure you use strong wood glue and screws for secure attachment. Consider using a drill to create pilot holes before driving screws to prevent splitting the wood.

    4.2. Attaching Shelves or Drawers

    If your design includes shelves or drawers, attach them to the frame using wood glue and screws. Remember to align them carefully to create a symmetrical and balanced look.

    4.3. Adding Finishing Touches

    With the assembly complete, it's time to add those final touches that will make your coffee table truly unique. Consider using a stain, paint, or varnish to give your table the desired color and protection. Follow the manufacturer's instructions for best results. You can also add decorative accents like hardware, drawer pulls, or even a unique top. Let your creativity run wild!

    Step 5: Finishing and Enjoying Your DIY Coffee Table

    Congratulations! You've successfully built your own coffee table! Take a moment to admire your work and appreciate the sense of accomplishment.

    5.1. Final Touches

    Take a look at your table from all angles and address any minor imperfections. You might want to add a protective finish like a sealant or wax to enhance the longevity of your masterpiece.

    5.2. Enjoy Your Creation

    Now it's time to style your coffee table and enjoy your unique creation! Add decorative items like books, plants, or a stylish vase to personalize it.

    Final Thoughts

    Building a coffee table is a rewarding experience that allows you to express your creativity and create something truly special for your home. Don't be afraid to experiment and personalize your design. Most importantly, have fun and embrace the process!

    Read More..

    Build a Strong Firewood Rack from Pallets: DIY Tips and Tricks

    Build a Strong Firewood Rack from Pallets: DIY Tips and Tricks

    Build a Strong Firewood Rack from Pallets: DIY Tips and Tricks

    Hey there, fellow firewood fanatics! Let's face it, storing firewood isn't just about keeping it dry, it's about having a dedicated space that looks good too. And who better to help us than our trusty friend, the humble pallet?

    Let's be real, pallets are everywhere. Construction sites, recycling centers, behind businesses... they're practically begging to be repurposed into something awesome. And a sturdy firewood rack? That's just the beginning! Today, we're going to unleash our inner DIY guru and transform those old pallets into a functional, stylish addition to our backyard or garage.

    Gathering Your Gear

    Before we dive into the building fun, let's gather our supplies. You'll need:

    • Two sturdy pallets (The sturdier, the better! Look for pallets with solid wood, not flimsy ones)
    • Measuring tape (To ensure everything fits perfectly)
    • Circular saw (For making precise cuts)
    • Safety glasses (Keep those peepers safe)
    • Screwdriver (For securing the wood)
    • Wood screws (Long enough to go through both pallet layers)
    • Wood glue (For extra strength)
    • Sandpaper (To smooth out any rough edges)
    • Paint or stain (Optional, for a touch of color or a natural finish)

    Step by Step: Crafting Your Firewood Fortress

    Step 1: Prep Those Pallets

    Let's get those pallets ready for their transformation. First things first, give them a good cleaning. Remove any loose nails, debris, or stubborn stains. Don't be afraid to get your hands dirty! Once they're sparkling clean, lay them flat on the ground. Now, it's time for a quick safety check. Are there any loose boards or cracks that might cause trouble? Go ahead and secure those with some screws or replace them with sturdier options.

    Step 2: Measuring for Success

    This is where your measuring tape comes in handy. Grab one of your pallets and decide how tall you want your firewood rack to be. You'll be cutting the second pallet to fit the height you choose. Measure from the bottom of the first pallet up to the desired height and mark it with a pencil or marker. Now, grab your trusty circular saw and make your cuts carefully! Safety glasses on, folks. Always remember to cut with the wood grain, not against it.

    Step 3: Creating the Base

    Alright, let's build our foundation. Place the first pallet flat on the ground, this will be our base. Now, take the second pallet (the one you just cut) and position it on top of the base pallet, making sure the top edge of the cut pallet lines up with the bottom of the base pallet. This will create the desired height for your rack. Secure these two pallets together with screws through the sides, aiming for the center of each board to ensure maximum strength. Don't forget to pre-drill pilot holes to avoid splitting the wood.

    Step 4: Building the Shelves

    Now for the fun part! We're going to create those awesome shelves for all your firewood. Take a look at the pallets you have. You'll notice that they have gaps between the slats. We're going to use these gaps to build our shelves. Measure the distance between the slats on the top pallet and cut some boards to fit those spaces. It's best to use sturdy boards that are about 2 inches thick and have the same width as the pallet slats. You'll want to cut a few boards to fit the gaps, creating a shelf-like structure. Once you have your boards cut, secure them to the gaps between the slats of the top pallet using wood glue and screws.

    Step 5: Sanding and Finishing Touches

    Your firewood rack is starting to take shape! Now, give it a good sanding with medium-grit sandpaper. This will smooth out any rough edges and give it a nice, clean look. If you're feeling creative, go ahead and add a splash of color with some paint or stain. Choose a color that compliments your outdoor space. If you want a natural finish, let the wood show through.

    Bonus Tips & Tricks: Let's Take This to the Next Level

    Now that you've built your firewood rack, why not add some extra flair? Here are a few tips to make it stand out:

    • Adding Wheels: Give your rack some mobility! Attach some casters to the base for easy movement around the yard.
    • Decorative Touches: Let your personality shine through. Add a rustic touch with some decorative metal brackets or hooks. Or, create a fun centerpiece by using some colorful weather-resistant paint.
    • Shelving Extravaganza: For even more storage, consider adding an extra shelf at the top of the rack. You can use the same method as before and cut boards to fit between the existing slats.
    • Extra Protection: If your firewood rack is going to be outside, a coat of weather-resistant sealer will help protect it from the elements and keep it looking its best for years to come.

    Time to Fire Up the Fun!

    Congratulations, you've officially created a fantastic firewood rack that is both functional and eye-catching! Now, get ready to cozy up by the fireplace, knowing your firewood is safely stored and organized. And hey, if you're feeling extra ambitious, use the same techniques to build a pallet bench or even a small garden table. The possibilities are endless! Happy building!

    Read More..

    How to Make a Pallet Firewood Rack with Minimal Materials

    How to Make a Pallet Firewood Rack with Minimal Materials

    Building a Pallet Firewood Rack with Minimal Materials

    Transforming discarded pallets into a functional and aesthetically pleasing firewood rack is a rewarding DIY project. It's a great way to repurpose materials while creating a practical storage solution for your winter fuel. This article will guide you through building a simple yet sturdy pallet firewood rack using minimal materials.

    Materials You'll Need

    Gather the following materials before you start:

    • One or two standard pallets (ideally in good condition)
    • Safety goggles
    • Work gloves
    • Hammer
    • Prying tool or crowbar
    • Measuring tape
    • Saw (circular saw, hand saw, or jigsaw)
    • Screwdriver or drill
    • Screws or nails (depending on your preference)
    • Optional: Wood stain or paint for finishing

    Preparing the Pallet

    Before you begin, ensure the pallet is safe to work with. Look for any loose nails or splinters, and remove them with the hammer and prying tool. It's essential to wear safety goggles and gloves throughout this process to protect yourself from potential hazards.

    Step 1: Disassembling the Pallet

    The initial step involves dismantling the pallet. Depending on its construction, this may require carefully removing nails or screws. Use the hammer and prying tool to gently pry apart the boards, taking care not to damage the wood excessively.

    Step 2: Cleaning and Sanitizing

    Once disassembled, clean the boards thoroughly. Remove any dirt, dust, or debris. You might want to lightly sand the boards to smooth any rough edges and ensure a clean finish. Optionally, you can use a wood cleaner or sanitizer to eliminate any potential contaminants.

    Constructing the Firewood Rack

    With the prepared pallet boards, you're ready to assemble the rack. The design flexibility here allows for customization based on your space and firewood needs.

    Step 1: Designing the Rack

    Consider the dimensions of your desired rack. Measure the space where you plan to place the rack and determine the optimal height, width, and depth. You can choose to create a single-tiered rack or a multi-tiered structure for greater storage capacity.

    Step 2: Cutting the Boards

    Cut the pallet boards to the lengths you require for the rack structure using the saw. Mark the boards accurately before cutting to ensure precise measurements. For stability, consider using longer boards for the bottom tier and shorter boards for upper tiers.

    Step 3: Assembling the Frame

    Create the framework for the rack using the cut boards. You can create a rectangular or square structure, depending on your preference. Join the boards using screws or nails, ensuring they are secure and aligned. For additional stability, use corner brackets or reinforcing pieces.

    Step 4: Adding the Shelving

    Construct the shelves for holding the firewood. You can use additional pallet boards or cut them to the required length for the shelves. Secure them to the frame using screws or nails, ensuring they are spaced appropriately for easy access and stacking of firewood.

    Finishing Touches

    Once the rack is assembled, it's time to add some finishing touches. This step is optional, but it can significantly improve the aesthetics and durability of the rack.

    Step 1: Sanding and Staining/Painting

    Sand the entire rack to achieve a smooth surface. This will also help to eliminate any splinters or rough edges. You can choose to stain the wood to enhance its natural grain or paint it in a color that complements your surroundings.

    Step 2: Protective Coating

    Apply a protective coating to the rack to enhance its durability and prevent weathering. Consider using a sealant or varnish to protect the wood from moisture and UV damage. This step is especially important if the rack will be exposed to the elements.

    Safety Considerations

    When building your firewood rack, prioritize safety. Always wear safety goggles and work gloves to protect your eyes and hands. When cutting wood, ensure the area is clear of any obstructions, and use caution to avoid accidental cuts or injuries. Also, use clamps to secure your wood while cutting for added stability.

    Additional Tips

    Here are a few additional tips for building a successful pallet firewood rack:

    • Choose sturdy pallets. Look for pallets that are in good condition with no major damage or cracks.
    • Consider using pre-treated wood. If you live in a humid climate, using pre-treated wood for the rack's construction will help prevent rot and decay.
    • Use a variety of sizes and widths of boards. Combining different pallet board dimensions adds visual interest to the finished rack.
    • Consider adding a decorative element. You could incorporate a metal hook for hanging tools or a small planter for adding a touch of greenery.

    Conclusion

    Building a pallet firewood rack is a fantastic way to put your DIY skills to use while minimizing waste. By repurposing pallets, you can create a practical storage solution for your firewood while adding a touch of rustic charm to your outdoor space. Remember to prioritize safety throughout the project and enjoy the satisfaction of creating something useful from discarded materials.

    Read More..

    Designing a Squirrel Den Box That Fits Your Yard

    Designing a Squirrel Den Box That Fits Your Yard

    Designing a Squirrel Den Box That Fits Your Yard

    Squirrels are a common sight in many backyards, their playful antics and bushy tails bringing a touch of the wild to our urban landscapes. However, providing them with a safe and comfortable shelter can be a rewarding experience. By building a squirrel den box, you can offer these fascinating creatures a place to rest, raise their young, and weather the elements. But with so many design options, how do you choose the right one for your yard? Let's dive into the key considerations for creating a squirrel den box that seamlessly blends with your outdoor space.

    Location, Location, Location

    The first step in building a squirrel den box is choosing the perfect location. Consider the following factors:

    Tree Height and Strength

    Squirrels are adept climbers, but they prefer to nest high in trees, out of reach of predators. Look for a tree with a strong, sturdy branch that can support the weight of the den box. The ideal height is between 10-15 feet, ensuring a safe distance from the ground.

    Exposure and Protection

    Choose a location that provides shelter from the elements. A spot partially shaded by foliage offers protection from the sun's harsh rays and heavy rain. However, avoid areas with dense undergrowth that might attract predators or hinder the squirrel's movement.

    Visibility and Access

    While you want to provide a safe haven for the squirrels, some visibility is essential. A location where you can monitor the den box, especially during the nesting season, is important. Make sure the chosen spot allows for easy access for observation and potential maintenance.

    Choosing the Right Materials

    The materials you use for your squirrel den box will directly impact its longevity and the comfort of its inhabitants.

    Wood Species

    Opt for weather-resistant wood species such as cedar, redwood, or cypress. These woods are naturally rot-resistant and insect-repellent, ensuring the den box remains sturdy and safe for years to come. Avoid using treated lumber, as the chemicals can be harmful to squirrels.

    Construction Techniques

    Construct the den box with strong joints and secure fasteners. Use screws instead of nails for greater durability. You can further reinforce the structure by adding metal flashing around the edges, protecting it from moisture damage.

    Interior Finish

    Keep the interior of the den box smooth and free of sharp edges that could harm the squirrels. Consider using a sealant or paint to protect the wood from moisture and mold.

    Design Considerations

    The design of your squirrel den box is as important as the materials. A well-designed den box provides a comfortable and secure habitat for squirrels.

    Size and Shape

    A standard squirrel den box is typically 12-15 inches wide, 12-15 inches deep, and 18-24 inches tall. Consider the size of the squirrels in your area when choosing dimensions. The box should provide enough space for the squirrels to move around freely and build their nest.

    Entry Hole

    The entry hole should be approximately 3-4 inches in diameter, large enough for a squirrel to enter and exit easily but small enough to deter larger predators. Position the entry hole near the top of the box, preventing rain from entering.

    Ventilation

    Adequate ventilation is crucial to prevent moisture buildup inside the den box. Incorporate ventilation holes on the sides or the roof of the box to allow for air circulation.

    Installation and Maintenance

    Once your squirrel den box is complete, it's time for installation.

    Secure Mounting

    Mount the den box securely to the tree branch, using strong brackets or straps. Make sure the mounting method allows for easy removal for cleaning and inspection.

    Placement and Protection

    Position the den box facing away from the prevailing wind and direct sunlight. You can also consider placing a predator guard around the base of the tree to deter cats and other predators.

    Regular Maintenance

    Inspect the den box regularly for signs of damage, wear, or infestation. Clean out the nest debris periodically, especially after nesting season. This will help maintain a healthy and welcoming habitat for the squirrels.

    Building a squirrel den box can be a rewarding project, offering a glimpse into the lives of these fascinating creatures. By carefully considering the factors discussed above, you can create a den box that fits your yard perfectly and provides a comfortable home for the squirrels in your neighborhood. So, gather your tools and get started, and enjoy the joy of welcoming these playful residents to your backyard.

    Read More..

    Essential Plans for Building a Durable Squirrel Box

    Essential Plans for Building a Durable Squirrel Box

    Building a Squirrel Box: A Guide to Durability

    Hey there, fellow nature enthusiast! Ever wanted to have a closer look at the antics of squirrels in your backyard? Building a squirrel box can be a fun and rewarding project, allowing you to attract these curious creatures to your space. But building a squirrel box that stands the test of time requires more than just hammering together some wood. We'll dive into the essential plans for constructing a durable squirrel box that will provide a safe and comfy home for your furry neighbors for years to come.

    Choosing the Right Materials: The Foundation of Durability

    Let's start with the building blocks of your squirrel box - the materials. You want to choose wood that's resistant to rot, decay, and the elements. Here's a breakdown of your options:

    The Classic Choice: Cedar and Redwood

    Cedar and Redwood are renowned for their natural resistance to rot and insects. They also possess a lovely natural aroma that can deter pests. These are excellent choices for the primary structure of your squirrel box.

    The Durable Alternative: Pressure-Treated Lumber

    Pressure-treated lumber is another reliable option. It's treated with chemicals to resist decay, making it a good choice for the bottom and the floor of the box where moisture is more likely to build up. However, keep in mind that pressure-treated lumber can contain chemicals that might not be ideal for sensitive animals. So, if you're concerned about the chemicals, opt for cedar or redwood for those areas.

    Putting it Together: Fasteners and Glue

    For joining the pieces of your squirrel box, galvanized screws or stainless steel nails are your best bet. These materials resist rust and corrosion, ensuring your structure remains strong and secure over time. Adding wood glue to the joints can further enhance the box's durability and create a tight, weatherproof seal.

    Constructing the Box: Step by Step

    Now, let's get down to the nitty-gritty of building the squirrel box. We'll break it down into simple steps, making it accessible for everyone, regardless of your carpentry skills.

    Step 1: Cut the Pieces

    Using your chosen wood, cut the following pieces according to your desired dimensions (adjust these to accommodate your squirrel box design):

    • Front panel: 1 piece, 12 inches wide x 10 inches tall
    • Back panel: 1 piece, 12 inches wide x 10 inches tall
    • Side panels: 2 pieces, 10 inches wide x 10 inches tall
    • Bottom: 1 piece, 12 inches wide x 10 inches tall
    • Roof: 1 piece, 14 inches wide x 12 inches tall (this overhang will help protect the entrance)
    • Entrance: 1 piece, 4 inches wide x 5 inches tall (make sure the entrance is slightly angled upward to prevent water buildup)

    Step 2: Assemble the Walls

    Start by attaching the front and back panels to the side panels using screws or nails. Make sure the joints are tight and even. Add wood glue for extra reinforcement.

    Step 3: Attach the Bottom

    Secure the bottom panel to the base of the assembled walls, ensuring it fits snugly. Use screws or nails and wood glue for a sturdy connection.

    Step 4: Create the Entrance

    Cut out the entrance hole in the front panel, making sure the top edge slopes upward. You can use a jigsaw or a drill and a chisel for this.

    Step 5: Attach the Roof

    The roof should overhang the walls slightly to protect the entrance from rain. To create the overhang, attach the roof to the back panel and the sides of the box using screws or nails. You can create a hinged roof for easy access to clean the box. Use hinges on the front panel for easy cleaning access.

    Step 6: Add Finishing Touches

    Sand the box to create a smooth finish and apply a sealant or paint to protect the wood from the elements. If you're using pressure-treated lumber, be sure to choose a sealant or paint specifically formulated for this type of wood.

    Location, Location, Location: Where to Place Your Squirrel Box

    Now that your squirrel box is ready, let's find the perfect spot for it in your yard.

    • Choose a shady location: Squirrels prefer a bit of shade, especially during hot summer months. This will help keep the box cool and comfortable.
    • Provide shelter: Position the box against a tree trunk or a wall for extra protection from wind and rain.
    • Think about height: Mount the box 8-12 feet off the ground. This will discourage predators and make it easier for the squirrels to access their home.
    • Keep it away from foot traffic: Choose a spot where the box won't be disturbed by people or pets.

    Making it Homey: Interior Touches

    To encourage your furry friends to make your squirrel box their new abode, here are some interior design tips:

    • Add nesting material: Line the bottom of the box with a layer of shredded paper, soft cloth scraps, or even a few sprigs of dry leaves. This will make the box feel more inviting and cozy.
    • Leave an access opening: Ensure there's an opening at the back or top of the box for easy access to clean the box and replenish nesting material as needed.

    Maintaining Your Squirrel Box: A Little TLC Goes a Long Way

    Once you've set up your squirrel box, it's crucial to maintain it to ensure it stays safe and inviting for your furry friends.

    • Clean it regularly: Check the box every few months, especially during spring and fall, to remove any debris, old nesting material, or signs of pests.
    • Check for damage: Inspect the box for signs of rot, wear, or damage. If you see any problems, make repairs promptly.
    • Keep it free of predators: Keep an eye out for predators like cats or raccoons. If you see any signs of them trying to access the box, consider installing a protective barrier or relocating the box.

    And there you have it! By following these tips, you'll be well on your way to building a durable squirrel box that will bring joy to both you and your furry backyard companions. Happy building!

    Read More..

    Downloadable Squirrel Box Plans for Beginners

    Downloadable Squirrel Box Plans for Beginners

    Downloadable Squirrel Box Plans for Beginners: Build a Delightful Haven for Your Backyard Critters

    Are you looking to add a touch of charm and wildlife to your backyard? Building a squirrel box is a rewarding and enjoyable project that can bring joy to both you and your furry friends. This guide provides you with everything you need to get started, including downloadable plans designed specifically for beginners.

    Why Build a Squirrel Box?

    Squirrel boxes, also known as squirrel feeders, offer a safe and cozy haven for these playful creatures. They provide protection from predators, harsh weather, and even other squirrels during nesting season. Building a squirrel box allows you to contribute to the well-being of your local squirrel population while enjoying the fun of watching them interact with their new home.

    Choosing the Right Plans

    The first step is finding the right plans for your project. There are numerous free and paid plans available online, but it's important to select ones that are appropriate for your skill level and available materials. Look for beginner-friendly plans that offer clear instructions and detailed diagrams.

    What to Look for in Squirrel Box Plans:

    • Easy-to-follow instructions: Ensure the plans are written in a straightforward and understandable manner, with clear explanations for each step.
    • Detailed diagrams: Look for detailed illustrations or blueprints that showcase the dimensions and placement of each component.
    • Materials list: The plans should provide a comprehensive list of necessary materials, including their quantities and sizes.
    • Beginner-friendly design: Opt for plans that are suitable for novice woodworkers, with simple construction techniques.

    Essential Tools and Materials

    Once you have your plans, it's time to gather the necessary tools and materials. Most squirrel box plans require basic carpentry tools and readily available materials. Here's a list of common essentials:

    • Wood: Choose a durable and weather-resistant wood like cedar, redwood, or pressure-treated lumber.
    • Saw: A handsaw or circular saw will be needed to cut the wood.
    • Screwdriver or drill: For securing the box together.
    • Screws: Use wood screws that are long enough to penetrate the wood securely.
    • Hammer: For driving nails if necessary.
    • Measuring tape: To accurately measure and cut the wood.
    • Level: To ensure the box is built straight.
    • Safety glasses: Protect your eyes during construction.

    Step-by-Step Guide

    Now that you have everything you need, let's get started with building your squirrel box! The exact steps will vary depending on the specific plans you choose, but here's a general overview:

    1. Cut the wood: Start by cutting the wood to the dimensions specified in your plans. Use a saw and measuring tape for precise cuts.
    2. Assemble the box: Follow the instructions to construct the box frame, using screws or nails to securely join the pieces.
    3. Add the roof: Attach the roof to the box, ensuring it has a slight overhang to protect the interior.
    4. Create the entrance hole: Cut a circular or rectangular entrance hole in the front of the box, making sure it's the appropriate size for squirrels.
    5. Install a landing platform: If your plans include a landing platform, attach it to the front of the box, below the entrance hole.
    6. Finish the box: Sand the exterior of the box to smooth out any rough edges. You can also apply a sealant or paint to protect the wood from the elements.
    7. Place and secure the box: Choose a suitable location for your squirrel box, high off the ground and away from potential predators. Secure it to a tree or post.

    Tips for Success

    Here are some additional tips to ensure you create a welcoming and safe home for your furry friends:

    • Choose the right location: Place your squirrel box in a shaded area, protected from direct sunlight and rain. Make sure it's at least 10 feet above the ground.
    • Use natural materials: Avoid using treated or painted wood inside the box, as this can be harmful to squirrels.
    • Provide ventilation: Make sure there are adequate ventilation holes in the box to prevent moisture buildup.
    • Clean the box regularly: Clean the squirrel box at least once a year to remove debris and parasites. You can use a mild soap and water solution for cleaning.
    • Observe from a distance: Enjoy watching the squirrels interact with their new home, but avoid disturbing them. Keep a safe distance to prevent them from feeling threatened.

    Building a squirrel box is a fun and rewarding way to connect with nature and create a haven for these fascinating creatures. With a little effort and creativity, you can create a cozy and safe home that will be enjoyed by generations of squirrels to come. Happy building!

    Read More..

    Protecting Your Plants with a Cold Frame

    Protecting Your Plants with a Cold Frame

    Protecting Your Plants with a Cold Frame

    A cold frame is a simple, yet effective, structure used to extend the growing season for plants by providing a protected environment. It acts as a mini-greenhouse, allowing gardeners to start seeds, nurture young seedlings, or overwinter tender plants. By trapping solar heat and protecting plants from harsh weather conditions, cold frames create a microclimate conducive to growth, even during colder months.

    While a cold frame might seem like a basic gardening tool, it offers numerous advantages for both seasoned and beginner gardeners. This article delves into the intricacies of using a cold frame, covering its construction, placement, and practical applications. By understanding the benefits and techniques associated with cold frames, gardeners can optimize their gardening experience and enjoy a longer, more productive growing season.

    Understanding Cold Frames

    Cold frames are essentially miniature greenhouses built on a low, flat frame. The frame is typically made of wood, metal, or even recycled materials like pallets. A transparent cover, often made of glass or plastic, is positioned on top of the frame to allow sunlight in and create a greenhouse effect. The trapped heat within the frame helps to protect plants from frost, wind, and cold temperatures, providing a nurturing environment for growth.

    Types of Cold Frames

    Cold frames come in various shapes and sizes, each with its own benefits:

    • Lean-to Cold Frames: These frames are built against a wall, taking advantage of the wall's insulation and creating a larger area for plants. They are relatively easy to construct and adapt to various spaces.
    • Freestanding Cold Frames: These frames are independent structures that can be placed anywhere in the garden. They offer more flexibility in terms of positioning and can be moved around as needed.
    • Mini Cold Frames: These small frames are ideal for protecting individual plants or small groups of seedlings. They are lightweight and portable, making them suitable for balconies, patios, or even indoors.

    Benefits of Using a Cold Frame

    Utilizing a cold frame brings numerous advantages to gardening, extending the growing season and increasing the success of your plants:

    • Extended Growing Season: Cold frames allow you to start seeds earlier in spring and continue growing into autumn, giving you a longer harvest period. They protect plants from late frosts and early freezes, preventing damage and premature termination of growth.
    • Improved Seedling Establishment: Cold frames provide a controlled environment for young seedlings, shielding them from harsh weather and pests. This increases their chances of survival and promotes healthy growth, leading to vigorous transplants.
    • Overwintering Tender Plants: Cold frames act as mini-greenhouses, allowing you to overwinter certain plants that are not hardy in your region. This helps you preserve valuable plants, ensuring they survive the winter and thrive in the following season.
    • Protection from Pests and Diseases: The enclosed environment of a cold frame provides a barrier against pests and diseases, minimizing the risk of infestation and promoting healthier plant growth.
    • Water Conservation: Cold frames reduce water loss from evaporation, leading to less frequent watering. This is especially beneficial in arid regions or during periods of drought.

    Construction and Placement of a Cold Frame

    Building your own cold frame is a rewarding experience. You can adapt the design to your needs and budget, using readily available materials.

    Materials for Construction

    Common materials used for cold frame construction include:

    • Wood: Durable and readily available, wood provides a sturdy framework for your cold frame. Cedar, redwood, and pressure-treated lumber are good options due to their resistance to decay.
    • Metal: Aluminum or galvanized steel are sturdy and corrosion-resistant choices for the frame. They are often used in commercial cold frames.
    • Recycled Materials: Pallets, old windows, and plastic containers can be repurposed to create a functional and cost-effective cold frame.

    Placement and Orientation

    The placement of your cold frame is crucial to maximizing its effectiveness:

    • Sunlight Exposure: Choose a location that receives at least six hours of direct sunlight each day. This will ensure sufficient warmth for your plants.
    • Drainage: Ensure the site has good drainage to prevent waterlogging and root rot. If necessary, raise the frame slightly to improve drainage.
    • Protection from Wind: Position the cold frame in a sheltered location to minimize wind exposure, which can cool the interior and damage plants.

    Using a Cold Frame: Practical Tips

    Once your cold frame is constructed, it's time to put it to use. Here are some practical tips to get the most out of your cold frame:

    Starting Seeds

    • Soil Preparation: Fill the cold frame with a well-draining potting mix or a mixture of compost and garden soil.
    • Sowing Seeds: Sow seeds according to the recommended depth and spacing for each variety. Lightly water the soil and cover the seeds with a thin layer of potting mix.
    • Ventilation: As seedlings emerge, gradually acclimate them to outdoor conditions by gradually increasing ventilation. This will help them develop strong stems and leaves.
    • Hardening Off: Once seedlings are about two weeks old, start the hardening-off process. This involves gradually exposing them to cooler temperatures and more sunlight to prepare them for transplanting into the garden.

    Overwintering Plants

    • Choosing Plants: Select plants that are hardy in your region but might not survive the full winter. Examples include herbs, tender vegetables, and perennials like geraniums.
    • Preparation: Before winter sets in, trim back plants and remove any dead or diseased foliage. Water the soil thoroughly and add a layer of mulch to help insulate the roots.
    • Monitoring: Check the plants regularly throughout the winter. Water when needed and remove any snow or ice build-up. Adjust ventilation as necessary to maintain proper temperatures and humidity.
    • Spring Transition: As spring approaches, gradually increase ventilation and watering to acclimate the plants back to outdoor conditions.

    Maintaining Your Cold Frame

    Regular maintenance is key to keeping your cold frame functional and protecting your plants:

    • Cleaning: Clean the glass or plastic cover regularly to remove dirt and debris that can block sunlight and trap moisture. This helps to prevent the growth of mold and mildew.
    • Ventilation: Provide adequate ventilation to prevent excessive humidity and overheating. Open vents or remove the cover during warm days or when temperatures rise above 70°F.
    • Watering: Water as needed, monitoring the moisture levels in the soil. Overwatering can lead to root rot, while under-watering can stress plants.
    • Pest Control: Inspect plants regularly for pests and diseases. Take prompt action to control any infestations or outbreaks.

    Conclusion

    Cold frames are valuable tools for gardeners looking to extend the growing season, protect plants from harsh weather conditions, and improve the overall success of their garden. By understanding the benefits, construction, and usage of a cold frame, you can reap the rewards of a longer, more productive gardening experience, even in colder climates. Embrace the versatility of this simple yet effective structure and enjoy the joy of growing plants year-round.

    Read More..

    Building a Squirrel Den Box with Recycled Materials

    Building a Squirrel Den Box with Recycled Materials

    Building a Squirrel Den Box with Recycled Materials

    Providing safe and comfortable habitats for wildlife can enrich your garden and support biodiversity. Squirrel den boxes, also known as squirrel houses, offer a secure haven for these playful and intelligent creatures, protecting them from predators and harsh weather conditions. Building a squirrel den box using recycled materials is an eco-friendly and cost-effective way to contribute to wildlife conservation. This guide will provide you with detailed instructions and helpful tips for constructing a welcoming and durable den for your local squirrel population.

    Choosing Materials

    The first step in building your squirrel den box is selecting appropriate materials. Thankfully, there are numerous options available in your recycling bin. Here are some excellent choices:

    Wood

    • Wooden Pallets: These are readily available and provide substantial, weather-resistant wood. Be sure to dismantle the pallet carefully, removing any nails or staples. Ensure the wood is clean and free from harmful chemicals or treatments.
    • Wooden Crates: Sturdy wooden crates often used for shipping or storage can serve as a great foundation for your squirrel den box. Look for crates with solid sides and a secure top.
    • Scrap Lumber: Leftover pieces of wood from other projects or salvaged wood from demolition can be used to create a unique squirrel den box. Choose durable woods like pine, cedar, or redwood.

    Other Materials

    • Recycled Plastic Containers: Large, sturdy plastic containers, such as those used for food storage or laundry detergent, can be cut and assembled to create a squirrel den box. Be sure to choose a container with smooth edges to prevent injuries.
    • Metal Roofing Sheets: While less common, salvaged metal roofing sheets offer excellent durability and weather resistance. Be careful when handling the metal and use appropriate safety gear.
    • Recycled Bricks: If you have old bricks lying around, they can be used to create a base for your squirrel den box. Ensure they are stable and level.

    Design Considerations

    The design of your squirrel den box is crucial for its functionality and the well-being of its inhabitants. Consider these important factors:

    Size and Dimensions

    • Minimum Size: A squirrel den box should be at least 12 inches wide, 12 inches deep, and 18 inches high to provide ample space for nesting and movement.
    • Entrance Hole: The entrance hole should be approximately 4-5 inches in diameter. This size allows squirrels to enter and exit easily but discourages larger predators.
    • Floor Area: Aim for a floor area of at least 144 square inches to give the squirrels sufficient room to turn around and move comfortably.

    Orientation and Placement

    • Facing South or Southeast: Position the squirrel den box facing south or southeast to maximize exposure to sunlight, keeping the interior warm and inviting.
    • Height and Support: Place the den box at a height of 10-15 feet above the ground. This helps protect the squirrels from ground predators and makes it easier for them to enter and exit.
    • Tree Support: Secure the den box to a sturdy tree branch using metal straps or brackets. Ensure the support is strong enough to withstand the weight of the squirrels and any potential weather events.

    Ventilation and Drainage

    • Ventilation Holes: Include several small ventilation holes on the sides or back of the den box to allow for air circulation and prevent moisture buildup.
    • Drainage System: Ensure the den box has a slight downward slope to prevent water from pooling inside, which can create damp and unhealthy conditions.

    Construction Steps

    Now that you have chosen your materials and design, let's begin the construction process.

    Step 1: Prepare the Materials

    • Clean all recycled materials thoroughly. Remove any dirt, debris, nails, or staples.
    • Cut and shape the wood or plastic according to your design. Ensure the edges are smooth and safe for the squirrels.
    • Prepare the supporting structure, whether it's a wooden frame or a metal bracket, to securely hold the den box.

    Step 2: Assemble the Box

    • Use screws or wood glue to secure the sides, bottom, and top of the den box. Ensure the joints are strong and watertight.
    • Cut the entrance hole using a jigsaw or drill. Smooth the edges to avoid any sharp points.
    • Add ventilation holes by drilling small holes on the sides or back of the den box.
    • Construct a floor using wood or plastic to create a flat and secure surface inside the den box.
    • If using a metal roofing sheet, carefully cut and shape it to fit the design of your den box. Secure it using appropriate fasteners.

    Step 3: Finish the Box

    • Apply a waterproof sealant or paint to the exterior of the den box. This helps protect the materials from rain and moisture.
    • Choose a non-toxic, wildlife-friendly sealant and paint. Avoid using bright colors that could attract unwanted attention.
    • Allow the sealant or paint to dry completely before installing the den box.

    Step 4: Install the Den Box

    • Securely attach the den box to the tree branch or supporting structure using metal straps or brackets.
    • Make sure the den box is securely attached and cannot easily move or fall.
    • Adjust the height and orientation of the den box to ensure it is accessible and inviting to squirrels.

    Enhancing the Squirrel Habitat

    Beyond providing a den box, you can further enhance your garden to attract and support a thriving squirrel population. Consider these suggestions:

    Food and Water Sources

    • Bird Feeders: Squirrels are attracted to bird feeders, so provide a dedicated feeder specifically for squirrels with larger seeds and nuts.
    • Planting Nut-Bearing Trees: Oak, hickory, walnut, and pecan trees are excellent choices, offering a natural food source for squirrels.
    • Fresh Water: Place a shallow bird bath or a birdbath with a ramp to make it accessible for squirrels.

    Nesting Materials

    • Shredded Paper or Cardboard: Offer these materials in a container or basket near the den box so squirrels can use them for nesting.
    • Twigs and Branches: Provide a pile of clean twigs and branches, which squirrels often use as nesting material.

    Predator Protection

    • Cat-Proofing: Keep cats indoors or restrict their access to the areas where you've placed the den box.
    • Predator Guard: Consider installing a predator guard around the base of the tree or den box to deter cats, snakes, or other predators.

    Maintenance and Monitoring

    To ensure the longevity and effectiveness of your squirrel den box, regular maintenance and monitoring are crucial.

    Regular Checks

    • Inspect the box: Check the den box for signs of wear and tear, water damage, or infestation. Repair any damage promptly.
    • Clean the box: Once or twice a year, remove any debris or nesting materials from the den box. This helps prevent disease and parasites.
    • Monitor the squirrels: Observe the squirrels using the den box and make note of any changes in behavior or health.

    Conclusion

    Building a squirrel den box using recycled materials is a rewarding and environmentally friendly endeavor. By providing a safe and comfortable haven for these playful creatures, you can contribute to wildlife conservation and enhance the biodiversity of your garden. Remember to choose the right materials, follow the construction steps carefully, and provide essential care to ensure your den box remains a welcoming home for generations of squirrels to come.

    Read More..

    Make your own wooden clock: a diy guide

    Make your own wooden clock: a diy guide

    Building Your Own Wooden Clock: A DIY Adventure

    Hey there, fellow crafters! Ever wanted to create a unique and personal timekeeper? Well, get ready to embark on a journey of woodworking and clock-making, as we guide you through the process of building your very own wooden clock! We'll cover everything from gathering the right materials to bringing your clock to life with a beautiful finish. So, grab your tools, unleash your inner woodworker, and let's get started!

    Gathering Your Arsenal: Tools & Materials

    Before we dive into the exciting world of clock-building, it's essential to have the right tools and materials at your disposal. Here's a list to get you started:

    Tools:

    • Saw: A jigsaw or a handsaw will be your trusty companion for cutting the wood to size.
    • Drill: Essential for creating pilot holes and fastening the clock mechanism.
    • Screwdriver: For securing screws and assembling the clock components.
    • Sandpaper: Smoothing out rough edges and preparing the wood for finishing.
    • Clamps: Holding pieces of wood securely while you work.
    • Measuring Tape: Ensuring precise measurements for accurate cutting.
    • Pencil: Marking your wood for cuts and drill holes.
    • Safety Glasses: Protecting your eyes from sawdust and flying debris.

    Materials:

    • Wood: Choose a wood that is sturdy and easy to work with. Popular options include pine, oak, or plywood.
    • Clock Mechanism: This is the heart of your clock, providing the movement. You can find various types online or at craft stores.
    • Clock Hands: These come in a variety of styles and materials, so choose ones that complement your clock's design.
    • Wood Glue: For securing the clock components together.
    • Screws: For attaching the clock mechanism and other components.
    • Wood Stain or Paint: Finishing your clock with a desired color or natural wood tone.
    • Clear Varnish or Polyurethane: Protecting your finished clock from scratches and moisture.

    Crafting the Clock Face: Your Design Canvas

    With your materials gathered, let's start building the clock face! You can choose from various designs, depending on your creativity and skill level.

    Basic Clock Face Design:

    • Cut the base: Start by cutting a circular piece of wood that will serve as the base of your clock. The diameter will determine the size of your clock.
    • Mark the center: Carefully mark the exact center of the circular base using a pencil and a ruler. This will be the point where you'll mount your clock mechanism.
    • Add clock numbers: Using a stencil, carefully mark the locations of the numbers on the clock face. You can choose to use Roman numerals, Arabic numerals, or even decorative symbols.
    • Drill number holes: If you want to insert the numbers, carefully drill holes to accommodate them.
    • Sanding and finishing: After marking the numbers, sand the face to remove any rough edges or imperfections. Apply a coat of stain, paint, or varnish to achieve your desired look.

    Adding Flair: Clock Face Variations

    • Carving: Elevate your clock face by carving intricate designs around the edges or in the center of the clock.
    • Inlay: Get creative with different types of wood or materials to create a visually appealing inlay on your clock face.
    • Intricate Patterns: Create patterns using a router or laser cutter, adding a unique touch to your design.

    Assembling the Clock Mechanism: Bringing Time to Life

    Now, let's bring your clock to life by integrating the clock mechanism. This is where precision and patience are key!

    Mounting the Mechanism:

    • Drill mounting holes: Carefully drill holes on your clock face according to the dimensions of your mechanism.
    • Secure the mechanism: Use the provided screws or nails to firmly mount the clock mechanism in place.
    • Attaching the hands: Insert the clock hands onto the mechanism's shaft, ensuring they are properly aligned. Some mechanisms may require a specific order for attaching the hands.
    • Test the movement: After attaching the hands, test the movement of the clock to ensure it's working properly.

    The Final Touches: Finishing Your Wooden Clock

    Your clock is almost complete! Let's give it that final polish to make it shine.

    Finishing Touches:

    • Sanding and smoothing: Sand the entire clock to ensure a smooth surface and remove any rough edges.
    • Applying stain or paint: If desired, apply a stain or paint to your clock face. Let it dry completely before proceeding.
    • Sealing with varnish or polyurethane: Apply a coat of varnish or polyurethane to protect your clock from scratches and moisture. Let it dry thoroughly.

    Setting the Time: Your Clock is Ready to Tick!

    Congratulations! You've successfully built your own wooden clock. Now, it's time to set the time and admire your handiwork. Hang your clock on the wall, or place it on a shelf, and let it serve as a reminder of your craftsmanship and creativity.

    Remember, building a wooden clock is a journey, not a race. Take your time, enjoy the process, and don't be afraid to experiment with different designs and techniques. Have fun with it, and let your wooden clock become a testament to your woodworking skills!

    Read More..