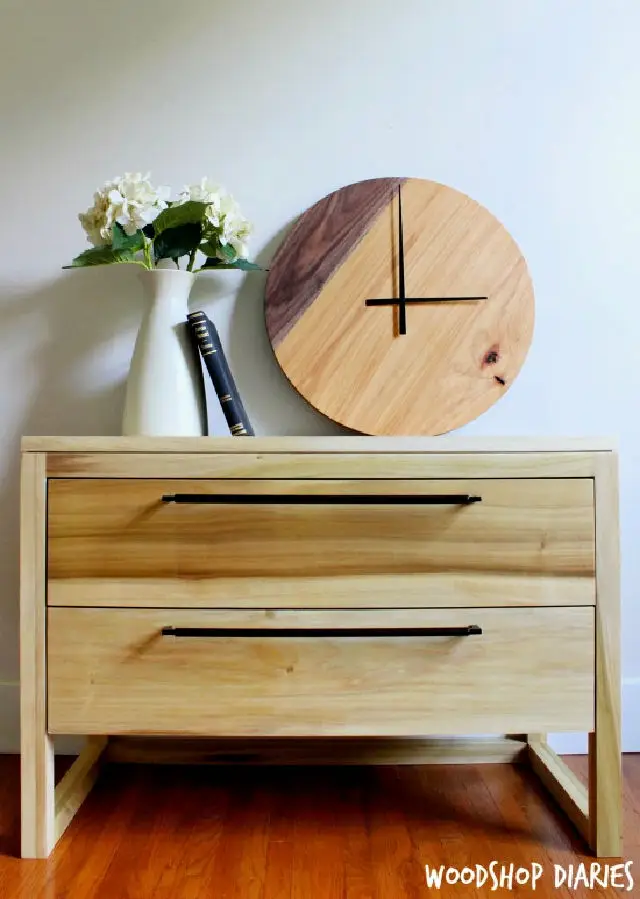
Building Your Own Wooden Clock: A Step-by-Step Guide
Hey there, fellow woodworkers and DIY enthusiasts! Ever wanted to create something unique and functional? Well, you're in luck! Today, we're going to dive into the world of woodworking and build our very own wooden clock. This project is perfect for beginners and seasoned crafters alike, offering a fantastic way to express your creativity and add a touch of handcrafted beauty to your home.
Gathering Your Supplies
First things first, let's gather the materials we'll need. Don't worry, this isn't a complicated shopping list! Here's what you'll need:
- Wood: Choose a wood that's easy to work with, like plywood, pine, or even a reclaimed piece of wood with character. You'll need enough to create the clock face and the base.
- Clock Movement: This is the heart of your clock, and you can find them online or at your local craft store. Make sure to get one with hands that suit your design.
- Sandpaper: Get a variety of grits to smooth out your wood.
- Wood Glue: This is crucial for bonding the clock parts together.
- Wood Stain or Paint: Personalize your clock with a stain or paint that complements your style.
- Finishing Oil or Polyurethane: This will protect your wood and give it a beautiful sheen.
- Clock Hands: Make sure they're compatible with your movement.
- Clock Numbers (Optional): You can use pre-made numbers or even get creative and create your own.
- Measuring Tape, Ruler, Pencil: These are your best friends when working with wood!
- Saw: A jigsaw or hand saw will do the trick.
- Drill: You'll need this for drilling the holes for the clock movement and hands.
- Screwdriver: For securing the clock movement.
- Clamps: To hold your wood pieces together while the glue dries.
Building the Clock Face
Now it's time to start building! Let's begin with the clock face, the most visible part of your creation.
Cutting the Wood
First, cut out a circle from your chosen wood. The size is up to you! You can make a small, dainty clock or a large, statement piece. If you don't have a circle cutting jig, you can use a compass and a saw to draw a circle and then carefully cut it out.
Sanding and Finishing
Next, grab your sandpaper and smooth out any rough edges. Start with a coarser grit and gradually work your way to a finer grit to create a smooth, polished surface. If you're going for a rustic look, you can leave some texture. Once you're happy with the sanding, apply your chosen wood stain or paint. Let it dry completely before moving on.
Adding the Numbers (Optional)
If you're adding numbers to your clock, now's the time to do it. You can use pre-made numbers or get creative and make your own from wood, metal, or even fabric. Mark their positions carefully on the clock face and secure them with glue or small nails.
Building the Clock Base
The clock base provides a stable foundation for your masterpiece. It can be a simple rectangle or something more intricate depending on your preference.
Cutting and Sanding
Cut a piece of wood for the base, ensuring it's wide enough to support the clock face. Sand it smooth, just like you did with the clock face.
Attaching the Clock Face
Center the clock face on the base and secure it with wood glue. If you want extra stability, you can also use small nails or screws. Clamp the pieces together while the glue dries, ensuring a strong bond.
Installing the Clock Movement
Finally, we're ready to install the heart of our clockâ€"the movement! This part is crucial for making our masterpiece tick.
Drilling the Hole
Carefully drill a hole in the center of the clock face, making sure it's the right size for your clock movement.
Securing the Movement
Place the movement in the hole you drilled and secure it with the provided screws or nuts. Don't overtightenâ€"you want a snug fit that allows the movement to rotate freely.
Attaching the Clock Hands
Finally, attach the clock hands to the movement. Most movements have a small nut or screw that secures the hands. Refer to the instructions provided with your movement for proper installation.
Finishing Touches
Congratulations! You've built a beautiful wooden clock! Let's add those finishing touches to make it truly special.
Applying a Finish
Give your clock a protective and attractive finish by applying a wood oil or polyurethane. This will help prevent damage, scratches, and water absorption. Follow the manufacturer's instructions for best results.
Setting the Time
Now comes the exciting partâ€"setting the time! Turn the clock hands clockwise until they reach the correct time. Make sure the hands move smoothly and don't hit anything as they rotate.
Enjoying Your Creation
There you have it! Your very own handcrafted wooden clock is ready to grace your home. Hang it on the wall, place it on a shelf, or proudly display it in your workshop. Enjoy the satisfaction of building something unique and functional with your own two hands!
Remember, this is just a basic guide. Feel free to customize your clock with your own unique touches. Add intricate carvings, paint it with vibrant colors, or even incorporate a personalized message. The possibilities are endless!
0 komentar:
Posting Komentar
Catatan: Hanya anggota dari blog ini yang dapat mengirim komentar.